The Mush Ends Here!

I couldn’t wait for my oldest to start solids! I was sure it would mean longer stretches of sleep and who can argue with that right? My only concern was the amount of work that seemed ahead. I had friends who spent entire days, roasting, pureeing and freezing ice cube sized portions of baby food for their little ones, and honestly, it didn’t look like a lot of fun to me!

When my daughter was about 5 months old, I came across a pin on good ‘ol pinterest about “Baby Led Weaning”. Intrigued, I clicked on the pin and it linked me to the book: “Baby-Led Weaning: The Essential Guide to Introducing Solid Foods-and Helping Your Baby to Grow Up a Happy and Confident Eater” by Gill Rapley. I pinned it onto my own board and a friend of mine commented that I should definitely look into it because she used baby-led weaning for all three of her kids and LOVED IT. I ended up e-mailing her, and asked her a few questions and when we were ready started using the method and LOVED it. I was so happy that I didn’t have to invest in a food processor, and those ice cube trays or those little glass food containers! It was also WAY less work .

I’m certainly no expert on the matter, but I do have a little bit of experience now that our second is ten months old and eating solids. So, how does it work? At about six months, most babies are developmentally capable of feeding themselves proper food, in other words – no more mushy peas! Hooray! You just hand them the same food that you’re eating in an appropriately sized piece and if they like it they eat it and if they don’t they won’t. (But they do…trust me). That’s all there is to it! No purees, no ice cube trays, no food processor, no food mill, no expensive organic baby rice, or weird fruit and vegetable combos in pre-packaged baby food jars! Just you, your baby and the food that you’ve prepared for the entire family! Because, let’s face it, the more time you spend preparing baby food, the less likely they are to eat it, right? As I mentioned before, I have friends who would spend days steaming, roasting and freezing food for their babies, only to have them refuse it *insert bitter tone.* The best part of Baby-led weaning is that there is no pressure on your little one to eat. There really is no opportunity for mealtimes to become a battleground, so issues such as food refusal and food phobias are much less likely. I think it’s because there is no such thing as baby or kid food anymore. Everyone eats the same thing, so you don’t have to worry about introducing “real food” when your child is 4 or whatever. This method respects babies’ decisions what to eat or what not to eat and when to stop eating, so there is no need for battles to ensue. I LOVE IT!

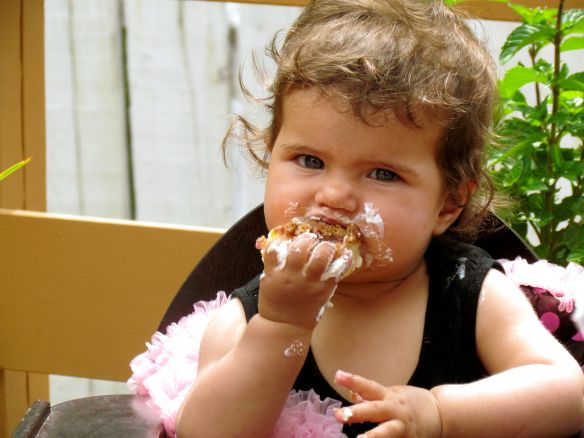
blogphoto

The question I get the most from parents who are interested in baby-led weaning is: “So, what do you feed your baby?“

To help you out, here is what we had to eat today at our house:

Breakfast

  • Toast, yogurt, granola, fruit

Snack

  • Fruit, crackers, cheese

Lunch

  • Soup, quesadillas, cut up peppers and Cucumbers

Supper

  • Beef and vegetable stir fry, rice

Dessert

  • Fruit

For our baby, we just cut the food into smaller pieces and allow her to pick what and how much to eat. Remember, when babies first start to eat solids, they probably won’t eat too much (unless they’re like my girls who practically gave up nursing as soon as we starting giving them “the good stuff”). Your little one decides how much solids they can handle and then supplement the rest of their nutritional requirements with milk (breast or formula).

Here are a few tips to help you along:

1. Forget baby food. It was really hard for me to wrap my mind around this at first, but if you don’t want to, you don’t have to give your baby so called “baby food”. My oldest daughter’s first meal was chicken, potatoes and peas. She LOVED it. We just cut the chicken into finger-sized pieces and she ate it. (She didn’t have teeth until she was 10 months old and still managed to eat it just fine!) My second daughter’s first meal was spaghetti.

2. Expect a mess. Put a few pieces of food (not too much food) on your baby’s tray and let them go to town!

3. Relax. With our first daughter, I was really nervous about choking. Remember, gagging is ok. It is a safety response to prevent choking. Babies seem to have very sensitive gagging reflexes, and that‘s good!

4. You know your baby best! Remember that!!!

So, what do you think? Will you give it a try? I promise if you do, you’ll love it!!

~Written by Andrea

Homemade Vitamin Gummies for Kids

First off I want to thank the ladies at  The Eco-housewives for asking me to write a guest post! We went to high school together but lost touch over the years and it is nice to watch their families grow and get to know each other again!

I am married to a very hard working man who is father to my three children aged 1-4 years old. We currently live on the East side of Canada and I am loving the early(ish) spring that they have here! I am a stay-at-home mom and I’m looking into homeschool for my oldest this fall. I am also an active member of the Weston A Price Foundation and a doTerra independent consultant.

I was reading about how Wellness Mama makes vitamin gummies for her kids and thought that would be a great way to get my kids to take their fermented cod liver oil (FCLO).

Why don’t you just give your kids the yummy tasting regular cod liver oil you ask? Because the regular stuff is heat processed, bleached, and deodorized to remove that fishy taste and the vitamins (usually synthetic) are then added back in. FCLO is the old fashion processing techniques, which involves fermenting and a proprietary filtering method, all at low temperatures to preserve the fragile unsaturated fatty acids and vitamins. FCLO is also higher in the wonderful vitamins D, A, and K2 and therefore you can take a smaller does.

If you are interested in more information about FCLO you can visit HERE

So.

Now that you know how awesome the stuff is how to I get my toddlers to take it? I turn it into a candy of course! You could add any number of vitamins to these gummies but be aware that if you add too much oil they will not solidify well (which is why FCLO works well because you can use less!)


INGREDIENTS:

Small pot

Ikea ice cup trays (or other gummy sized moulds)

Coconut oil (to grease the mould)

2-3 ml FCLO (or other vitamins, minerals or supplements)

8 tsp of Gelatin

2 TBLS of Raw Honey

1/2 cup of liquid. You could use fruit juice, water Kefir or even Kombucha!

3-4 drop of doTerra essential oil in Lemon or Wild orange. (Optional)

***If you are adding essential oils PLEASE ensure that they are therapeutic grade and recommended for consumption. doTerra is one of the only oils on the market that can be consumed. If you are interested feel free to check out their website. (#342462)

http://www.doterra.myvoffice.com/kimbombak/

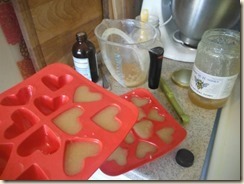
DSCF1235_thumb[2]


PUT IT ALL TOGETHER!

If you are lucky to have the awesome gelatin that dissolves easily in cold water then mix everything together really well (maybe in a Magic bullet?) and pour into your greased ice cube trays to set.

If Not……

Warm your juice and dissolve your gelatin.


DSCF1237_thumb[2]

*This is a large batch because my kids eat lots of these!*

Remove from heat and let cool slightly before adding your honey and vitamins and flavouring. If your mixture is too hot your essential oil will evaporate, your honey will no longer be raw and your vitamins may be compromised….so let it cool a little!

DSCF1238_thumb[2]

*Measuring out the FCLO*

DSCF1239_thumb[2]

*Mixing in the FCLO and the essential oils*

*Putting the liquid in the moulds*

*Putting the liquid in the moulds*

One child serving of FCLO is 1/4 tsp. I put 3 tsp into this recipe to get 12 large gummies…which last me 4 days. Pop them in the fridge to keep them fresh.

WATCH!

*See my babies gobble them up..yummy vitamins!*

*See my babies gobble them up..yummy vitamins!*


-Guest Post Written by Kim

Cloth Diaper Obsession Turned Business

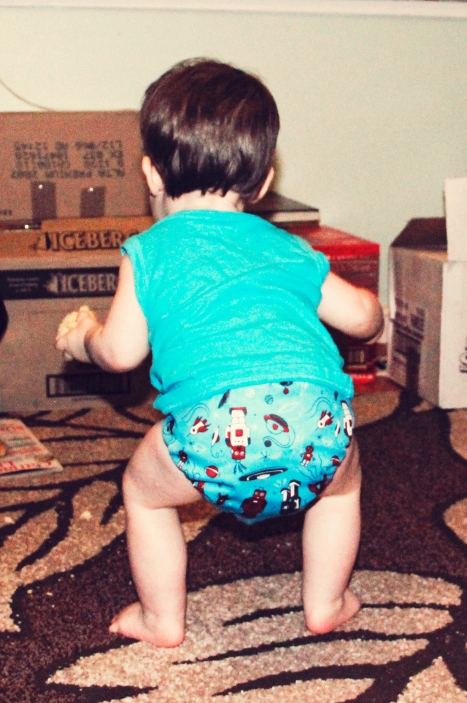
One of the only things I didn't make... A Grovia cover. How could I resist that super cute print!?

One of the only things I didn’t make… A Grovia cover. How could I resist that super cute print!?

I knew I was going to cloth diaper my son before I even became pregnant with him. From the time we began thinking about kids I knew that would be the case. I learned to sew as a small girl so, for me, it was also a no-brainer that I would make them myself. And luckily I wasn’t working so I had a lot of time to fill!

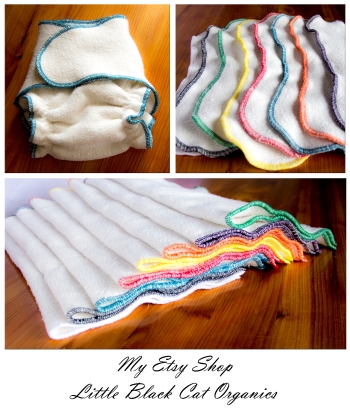
I started off with a simple pattern for fitted diapers and some covers. From there I tried my hand at AIOs (All in One diapers are a diaper that have an absorbent and waterproof layer all in one so you don’t need anything else). I made cloth wipes, two diaper bags, and a diaper change pad. I experimented with different types of fabric, and different diapering systems. To be honest, I was a little obsessed with making diapers and diaper related accessories.

My sons’s entire diaper stash is huge, and I made them all. Does he need as many as I made? No, definitely not. I made him swim diapers, and bibs. I made a lot of stuff! All that obsessive sewing did lead me to somewhere, though. I decided to start my own business! I love making cloth diapers, so why not share that love with everyone.

Little Black Cat Organics Facebook Page

Little Black Cat Organics Facebook Page

It was hard finding time with a very active baby boy getting into everything and a husband who works out of town but I have worked hard on perfecting a diaper that I could be proud to sell and discovering what fabrics I loved the most. I use only natural fabrics. With all my experimenting I’ve fallen in love with them. I mean I wish all my own clothing was only natural fabrics. They are breathable, gently on your skin, and good for the environment – with the exception of some fabrics which must be grown organically to be good for you and the environment. Cotton, for example, when grown and harvested traditionally uses various pesticides and chemicals and is not anywhere close to being “fair trade”. For this reason I try to also be socially responsible in my search and purchase of fabric. I buy all organic fabrics (and fair trade as much as possible) and try to buy local (which can be hard but you can at least support local small businesses that sell fabric). My favorite fabric has to be hemp. It is highly sustainable, grows very well without the use of pesticides or chemicals, grows quickly, and does not deplete soil nutrients, not to mention hemp fabric is super absorbent, soft, strong, antimicrobial, and mildew resistant! You can find almost any type of fabric you need made from hemp.

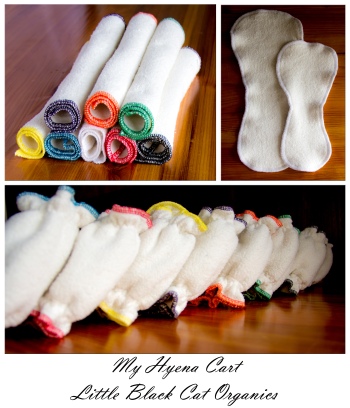
http://hyenacart.com/stores/littleblackcatorganics/


Basically, I stay away from petroleum fabrics (polyester, microfibre, etc). People like the “stay dry” abilities of them, but I’ve only found that they equal more diaper rash and less absorption. Synthetic fibres don’t actually absorb wetness. They trap it in between each fibre, which means they will be susceptible to compression leaks – leaks caused by putting pressure on the object, like a sponge for example. So I’m not so sure how much the baby actually feels dry – sure when you take the diaper off it feels dryish but it’s not being put under any pressure. And since when has your baby or toddler not spent their whole day falling on their butt, sitting on their butt, laying on their backs, moving around all over the place. Seems like the wetness would constantly be getting squished out of the traps. And besides, my son seems to not care either way. He has never made a fuss whatsoever about his butt feeling wet!

So it has taken me over a year to finally get set up. I’ve started small – with just the items I love to make most. But with more and more time on my hands as my son gets older and more independent, I’m exploring more things and will add more and more as I go. I’m excited to see where my small little business will take me!

Stop by and take a look if you have the time.

http://www.etsy.com/shop/LBCOrganics


– Written by Nicole

Natural Treatment Options for Diaper Rash

Diaper rash. Something every little one is probably going to experience at least once in their diaper wearing lifetime. And, if you’re a mom I’m sure you know, it is no fun for anyone. Luckily for me, I didn’t have to deal with my first bout of rashiness until my son was almost 1! We had gone on a long roadtrip, and sure enough, before we made it back home it had begun to spread pretty bad. I did use Penaten in the beginning. My mom (and most moms from her generation I think) swear by it. But it didn’t work very well for me at all. The rash lingered. My son had his 1 year well baby visit soon after so I showed it to the doctor, and she said it looked like it could be a yeast rash and to try using the over the counter yeast infection cream I would use for myself. Well, I don’t use it and I wasn’t about to use it on my son if I could find a better alternative. So, I set off on a hunt for some natural alternatives for treating the yeast (and regular) diaper rash. I am happy to say that it was fairly easy and the options are pretty diverse. So, instead of detailing my journey, I’m just going share with you what I found has worked out best for my son and I!


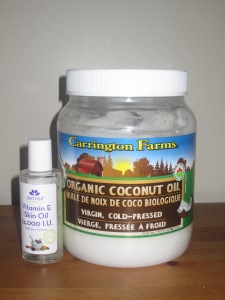
IMG_26171. Coconut oil – virgin, unrefined is best. This is a great alternative for Vaseline as a moisture barrier and awesome for minor rashes. Mix a bit of topical grade vitamin E in with it and it works even better! And, it’s cloth diaper friendly. But, if you do mix in the vitamin E don’t let your little one get it in his mouth as that type of vitamin E is not meant to be ingested. If you have a pretty fantastic rash to deal with though, I find you’ll need to use some other tactics as well.


2. I’m sure you’ve heard it before but I’m going to say it again – let them have lots of, what we call in our house, naked bum time! Let them have at least 15 minutes a day, and let their bums dry after being wiped before putting that clean diaper on.


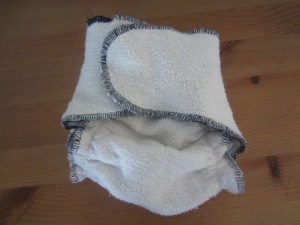
IMG_26243. Natural fibres (my favourite is hemp)!! If you cloth diaper, and this is an option for you (I’m in no way saying run out and buy more diapers!) use natural fibres. I have a lot of info and opinions about natural vs synthetic (I sewed all my own diapers and used both!) and if you ever wanted to have a discussion or ask questions I’d love to chat with you! But, for today, I will make just one point. Polyester is a petroleum product – not eco-friendly at all. I know it’s hard to get away from it when cloth diapering, and obviously cloth diapering is much better for the environment (and baby’s bottom) either way, but I like to keep my use of synthetics to a minimum i.e. only in the covers. Natural fibres breathe and this is oh so important when it comes to treating and keeping that nasty rash away. If you have wool covers use them as much as you can while the rash is around!


4. Don’t use throw away wipes – at all if you can. If you do use them, try to get ones without alcohol as it can not only be painful on baby’s bum, but  it also dries out the skin and aggravates rashes.


IMG_2610

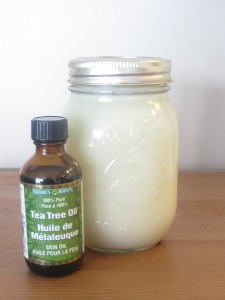
5. Use a cloth wipe solution that contains antibacterial and/or anti-fungal essential oils with your wipes. Zany Zebra has several nice ones to try here. I make the Olive n’ Tea Tree Oil solution. Once I’ve mixed it up I store it in glass jars. I dilute it down to 3:1 water to solution and it still works great. I use it periodically rash or not (I basically alternate with pure water back and forth) and to be honest, since I started using it my son hasn’t had a single diaper rash so it must work pretty well!


IMG_2619

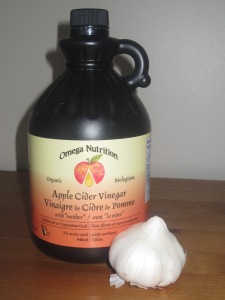
6. Finally, Apple Cider Vinegar (organic with the ‘mother’) and raw garlic are an amazing defense for yeast rashes. Crush one raw clove of garlic with 2 tbsp of ACV into 1 cup of hot (not boiling) water. Let it sit for at least half an hour before using. You’ll want to store it in something with a wide mouth. After you’ve cleaned your little one’s bum you pat the solution on to the rash with a cloth. Let it dry a bit before putting on the diaper. The garlic and ACV help kill the yeast. It will eventually start to dry out baby’s bum though, so I like to alternate each diaper change with coconut oil.


There are so many more safe and effective alternatives (sometimes more so than the ‘traditional’ routes) than the ones I’ve listed here. What are some of your go to treatments for diaper rash?

-Written by Nicole

Got Milk?

I am so thankful that I have had really good breastfeeding experiences with my girls. I was able to breastfeed Abigail for just over 10 months until the morning sickness with Susanna got so bad that my milk dried up. I know so many women who didn’t get so “lucky”. When Abigail was born, she latched right away and my milk came in a few days after she was born and all was great until a few months in. About twelve weeks postpartum, I started going to bootcamp to get back to my pre-pregnancy self. Soon after that, my mum was briefly hospitalized and Abigail started waking up in middle of the night. I don’t want to brag, but Abigail was sleeping through the night when she was 2 months old, so when she stopped, I was NOT pleased! I couldn’t figure out what was going on for a few weeks until I tried pumping because I was going to leave her with my husband for a few hours. When I pumped I wasn’t able to get more than a few drops of milk! Naturally I freaked out-I’m pretty sure I cried! No wonder I had a cranky baby, no wonder she was waking up throughout the night! She was starving!!!  The stress of my mother’s hospitalization and the excessive exercise had destroyed my milk supply!

I starting doing a ton of research to help increase my milk supply and I want to share with our readers what I learned. There are several different ways to increase your milk supply, but I’ll share with you the methods that I tried.

abigail-062

1. Mother’s Milk Tea-I used Earth Mama Angel Baby Organic MilkMaid Tea. This worked ok, I would drink several cups a day and it did increase my supply by a couple ounces within 24 hours, but my supply was inconsistent, and the tea is pretty pricey.

2. Fenugreek Pills-these worked really well for me. Some women don’t find a huge increase in their supply or get an inconsistent milk supply with fenugreek. The important thing to know with fenugreek is that you can’t start taking the pills and then stop cold turkey once your supply has increased. You will lose your milk supply almost instantly if you abruptly stop the pills. Once your supply has increased, you need to wean yourself off fenugreek slowly. I think I took a week or so to slowly wean myself off the pills. I have also heard of some women who have tried sprouting fenugreek at home and that form of the herb seemed to work better for them. If I have any milk supply issues I may try sprouting fenugreek as I’ve recently become obsessed with sprouting!

3. Hemp Hearts-my Mum stayed with us for 2 weeks after Susanna was born and was doing a lot of yummy baking for us. She was adding hemp hearts to cookies, oatmeal and muffins and when I looked up to check if it was ok to eat hemp hearts while breastfeeding, I found tons of literature that said that hemp hearts actually increase your milk supply. I attribute the hemp to my ridiculous milk supply this time around. Susanna will have a normal feed and I can still pump 4-5 ounces of milk after she’s done nursing!  YAHOO!

4. Sleep-Easier said than done with a new baby, but if you can get some help, try to rest or nap as much as you can, especially in the early weeks! With rest, your body has more energy to make more milk!

5. Good Diet-the better you eat, the better your milk supply will be! Make sure you are eating properly (Thanks Mum, I miss you and your mad cooking skills!!) and often if you want to give your babe some nice fatty milk! I’ve also read that if your iron is low your milk supply will be affected. I don’t eat meat, but if you do make sure you’re eating enough red meat or spinach (if you’re a vegetarian) to increase your iron stores. If you’re not a spinach or meat fan, word on the street is that mini-wheats have a ton of iron in them! Who knew??!!  It’s also crucial to stay hydrated! It takes liquid to make liquid right? Try to drink at least one glass of water during each feed (P.S. I suck at staying hydrated, but when I make a conscious effort to drink, my milk is so much more abundant!)

6. Pump like crazy-this is the most important piece of advice I can give you!  Apparently the receptors for making milk in your brain are made within the first two weeks of your baby’s life. The more you pump or keep your baby at your breast in those early weeks, the better chance you have at protecting your supply. In the first few days before your milk comes in, allow your baby to nurse as much as possible. I know it’s hard because usually baby is very lethargic and let’s face it, you’ve just delivered a baby and all you want to do is sleep, but trust me, if you allow your baby to nurse as much as possible during those first few days, your milk will come in faster and you’ll have more to offer your little one! After your milk comes in, make sure your baby is at your breast as much as possible. If baby isn’t latching properly, PUMP! It’s so important to protect and build up your milk supply in those first few weeks of baby’s life!

Well, that’s all the advice that I have. Anyone else have any tips for increasing your milk supply? We’d love to hear them!

http://www.breastfeedinginc.ca is a great resource !

Written by Andrea

A Caesearean Love Story

Recently, a friend of mine was feeling particularly low because of the caesearean she had had almost a year ago now. This didn’t surprise me, however, as many of the women I know who had unplanned caeseareans often feel the same or similar feelings. The other morning wasn’t the first time I’d heard it, nor will it be the last. I, too, still struggle with it from time to time and my son is now almost a year and a half. So, I felt compelled to write a little something, the story of my struggle, but also a story of love…

As expected, the birth of my son didn’t go as planned. I was huge, he was overdue, and my husband (who works out of town) was missing work to stay close to home. I agreed to induction (originally not in my birth plan) and five days and 24 hours of labour later, my son was born via caesearean.

I felt pressured. Not by my husband, not by my doctors even, but by the circumstances of life being what they were. Get out, son! It would be most convenient for you to come now. He was very happy, and doing fabulously in my belly, but we needed him to arrive. And, thanks to modern medicine we could force him out. Two rounds of Cervadil accomplished nothing more than to create a leak in the amniotic fluid. So, Pitocin was heavily suggested. I started contractions on my own in the early morning hours before going to the hospital for the pitocin induction to begin, but they still wanted to use it to augment my labour. It was awful, the contractions were never ending. Just when they would start leveling off, time to up the dose! Horrid. The doctor came in and broke my water (I suspect because he didn’t want to stay too late). After pushing for what was around 3 hours, I was told baby boy was not in a good position (which he had been up until sometime before my water was broken) and caesearean was the answer. I was so tired, I didn’t care. I was more worried about how it made my husband feel. He was scared. I was exhausted.

It wasn’t until getting home and after being alone, lurching around, watching every move as to prevent my insides from bursting forth from my scar (I imagined this happening a few times) that I began to feel it. The guilt, the failure. Why did I let it happen? I said yes to every option that (what I believe) inevitably led to my caesearean.

maelborn

We moved to a new town midway through my pregnancy, and although our original plan was to get a midwife (maybe even have a home birth), there were only so many in town and they were all booked up. So, I decided to at least get a doula. My doula, Cindy Black was amazing. She was very open and easy to talk to. We discussed all the usual fears and apprehensions a soon to be new mom (and dad) could have. We went through want I wanted in my birth plan and we talked about what I wanted in the case of a caesearean, but to be honest, I thought it would never happen. She prepared me though. For all possibilities. And she was there, through it all – she even sat next to me while they sewed me up.

So, what happened? I prepared myself, I had support, I was always given a choice. It’s not my fault, but it feels that way. It feels like my body let me down, and in turn I let my body down. I did it a disservice by not giving it the chance to do what it was made to do. I feel guilty. I feel sad. It wasn’t postpartum depression (thankfully), I just felt like I had failed in some way. Given the chance to do it again, my decisions would be quite different.

But that’s the point, isn’t it? Hindsight is 20/20. I can’t do it over again, so why do I continue to beat myself up over it? My son is 16 months old now and I STILL think about it from time to time. People say all that matters is we are both here, happy and healthy. Of course this is true, but rarely is it comforting. My doula says that it is my birth story, unique to me. And, if I have another child, his or her story will be different from my son’s. But still, the feeling lingers. No one can make me feel ok with it, but me. I have to let it go. I have to forgive. I have to move on. How though?

I find myself feeling less and less guilty as time passes. I think about it less. Thankfully, my ob-gyn did an AMAZING job and my scar is hardly noticeable even by me, which helps. When I find myself talking to other women who have had unplanned caeseareans and how they feel the same sort of feelings it makes me feel better, for many reasons. I feel better knowing I’m not alone. It seems to be normal to feel that way. But then, I’m angry! Angry that it’s normal to feel this way! It’s not ok! We don’t deserve to treat ourselves like this! And that makes me feel unashamed. I am not guilty of anything! And that, is the truth!

My doula is right, it is my son and mine’s unique birth story. It is my memory of our first meeting. I can not sully it with feelings of inadequacy. I must remember it with love, and respect. For myself and what I have championed over. And, this is what I will remember…

maelbornsteven
My son and my husband have an AMAZING bond. Instead of him spending his first moments with me, he spent them with his father. Him and I will always have a bond no matter what. He was inside me for 9 months. I was the first one to ever feel him. I didn’t have to have it, so instead my husband was able to.
Because I had a surgery to heal from, instead of jumping back into life pretty quickly, I spent a lot of time relaxing, letting things slide. For a long time. I spent all my time cuddling and playing with my son. We napped together. I had 8 weeks to fully recovery after all.
And, I have a scar. Not a scar representing a caesearean, but a scar representing the birth of my son, the love of my life. I will always have it. It reminds me of him. It reminds me that he used to be tiny and fragile and new. He is of me and I am of him. It will always be there to help me remember the very real physical bond we shared and the spiritual bond we will always share. It IS him. And, when he asks me what it is one day, I want to, with love in my heart, tell him those words. Not words of regret. It is, after all, what brought us together.

Written by Nicole

Ramblings of a Post-Partum Mama

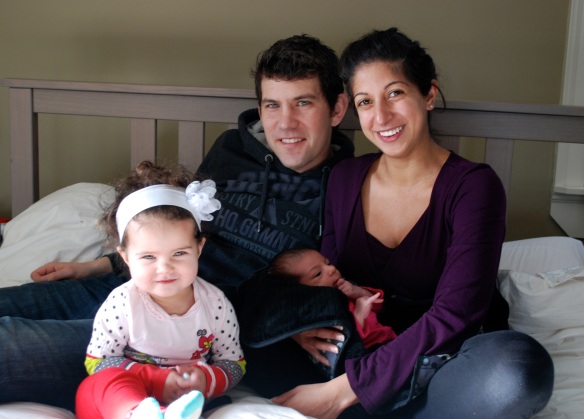
Our happy family of four!

Our happy family of four!

Matt and I are thrilled to announce the arrival of our beautiful daughter, Susanna Elisabeth Asha! She arrived early in the morning on Tuesday January 22nd, just  a few hours before I was scheduled to be induced. We were so thankful that this little one arrived before I was induced as I had to be induced with her older sister and labour and delivery with her was very long and very difficult!

Susanna’s birth was very quick-31 hours faster than Abigail’s! It was intense, and we almost didn’t make it to the hospital in time, but at least it was quick! The details of her birth are very fuzzy, but I’ll do my best to tell Susanna’s story. My biggest fear with labour was that Susanna would be OP (When a baby is head-down but facing your abdomen, she’s said to be in the occiput posterior (OP) position)! Abigail was OP and the back labour was HORRIBLE! Monday night (the night before I was to be induced) I spent a lot of time on my hands and knees, trying various yoga positions in the hope that this baby would not be OP. When I went into labour in the middle of the night, I was relieved that this baby seemed to be in the right position! The contractions were intense, but nowhere near as painful as the ones I had with Abigail. We left for the hospital about 3 hours after my labour started because after about 2 hours my contractions were already 4 minutes apart. I didn’t want to go to the hospital yet, but my husband and my mum thought it would be a good idea. It turns out they were right! When we got onto the bridge to get into Kelowna, I felt the baby turn and suddenly felt the urge to push. I have to admit I started panicking, but my ever calm husband didn’t say a word, he only sped up!! During this contraction I felt that old familiar pain in my back! The baby was definitely OP and the contractions were now all in my back! UGH! By the time we got to the hospital I was on my hands and knees in the car trying really hard not to push! Upon entering the hospital, the security guards asked if I wanted a wheelchair. I must’ve said yes, because they went looking for one and came back in what seemed like an eternity-Matt assured me it was only 1 minute later. PS-I don’t get the whole stick a woman who’s in labour into wheelchair thing….when Matt was trying to get me to the labour and delivery ward, I kept asking him to stop the wheelchair so that I could hop off and get on my hands and knees to “deal” with a contraction. By the time we got to the labour ward, I was basically ready to have the baby on the hospital floor, but the nurse took me into a room and somehow managed to get me into a gown and onto the bed. They called my doctor, who came very quickly and I started to push. I should mention that I was getting over the flu at the time, so I was very weak from that.I pushed for two hours, but because she was OP like her sister, she was stuck. Finally, after two hours, she turned! After she turned, she came out two contractions later!  Looking back it was probably good that she turned into an OP position on the bridge or else we would’ve had a baby born on the bridge that night!
I don’t remember much else from that night, I think I went into shock from the labour progressing so quickly, but I do remember Matt being there for me and helping me through each contraction. His claim to fame is that nurses from two different hospitals have told him what a great labour coach he is! I told him that he should quit  forestry and take up being a Doula! (He’s still on the fence about that). I also remember the moment Matt told me that we had another little girl and of course I remember when the doctor put her on my chest for the first time! I didn’t get to hold Abigail right away because of some complications with her birth, so it was so special for me to have my baby put on my chest right after she was born A true miracle!!
I want to end this post with two thoughts:
First, if you’re in labour and your baby is OP, there are a few positions that you can try to turn your baby.
  1. Polar Bear- on your knees with chest on the floor or bed, bottom in the air) for 20-40 minutes, then go to the hands and knees swaying. The polar bear helps baby get “unlocked” from the pelvis and helps allow him to turn.
  2. Standing or kneeling lunges – this widens one side of your pelvis and encourages rotation of the OP fetus. This is what finally encourages Susanna to turn! 
Finally, a few things I am thankful for:
1. My husband (the best doula a girl could ask for)
2. Another beautiful, healthy baby girl
3. A quick labour that didn’t result from an induction!
4. The ability to nurse (I have some friends who have had such a difficult time with this, and both my girls have been great feeders, so I am very thankful for that)
5. The fact that Susanna was born in a hospital and not on the William Bennett bridge!
-This post was written by Andrea 

Colourful and Edible Finger Paint!

Paint 1
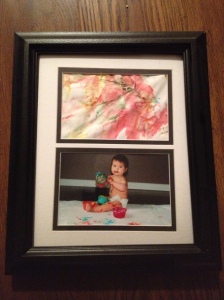
Last year for Mother’s Day I wanted Miss A to do something special for my mum and mother-in-law.I’m always stumped for gifts for these two fabulous ladies, and I thought something that their granddaughter made would be perfect.  Enter Pinterest. I saw this adorable idea and thought: “we can totally do this.”  I bought a couple of photo frames from Wal Mart and took a photo of her painting and filled the top space with that and the bottom space with an actual painting that she created. It was such a big hit! Her grandmas loved them!
paint 3
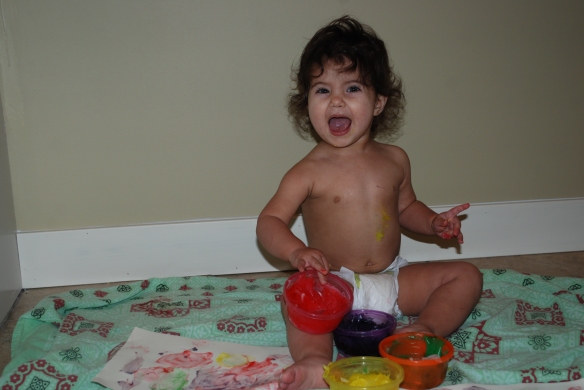
Here’s a photo of our little doll enjoying herself! Note: I will admit that I sort of had to force her to “paint” on the paper, she was WAY more interested in tasting the paint.
Miss A was only 10 months old at the time and was at that stage where
EVERYTHING went in her mouth..actually, she’s still in that stage! I was worried about buying finger paints, so I decided to make my own. This is the recipe I used:
~INGREDIENTS~
  • 1/2 cup cornstarch
  • 3 Tbsp. sugar
  • 1/2 tsp. salt
  • 2 cups cold water
  • food colouring
1) In a saucepan, mix all the ingredients together except the food colouring. Cook over medium-low heat, heat the mixture for about 10 to 15 minutes. Make sure that you are stirring the mixture the entire time it is on the heat
2) After the finger paint has thickened take the pan off the stove immediately, and let the mixture cool. I split the mixture in four plastic bowls to cool.
3) In each bowl, I used several drops of food colouring to create the  colours that I wanted. This recipe makes a lot of paint, so you could make several colours. I just stuck to red, green, yellow and blue.
I was so proud of myself and my homemade finger paint that I posted this photo on Facebook and I had over 30 people ask me for the recipe. A lot of the mamas asked me if the painted stained my little babe’s fingers. The answer is no; I didn’t have any trouble with staining, but it did get me thinking about natural food dyes and whether or not it was a good idea to let her eat it the stuff with food colouring in it.
So, a few months later, we tried again, but this time, I avoided using food colouring and instead I made my own natural food colouring. Now, there are lots of different ways to make these colours, but, when you’re 8 months pregnant, trying to get settled and unpack a house while simultaneously trying to take care of a toddler and get ready for Christmas, easy is always better!!
Paint 2
Here’s what I did:
Yellow: 1/2 tsp of stale turmeric (I know some of you may think that this will stain, but it actually didn’t stain her fingers!)
Red: Brew a really strong cup of raspberry tea and use one cup of that and the other cup of water (make sure tea is cool) (3 teabags into one cup of water)
Blue/Purple: Blueberries from my Costco berry mix. I just mashed up some berries and put the juice in the mixture
Green: 30 drops of  chlorophyll concentrate made a nice green colour
The colours weren’t as vibrant as when I used store-bought food colouring, but I felt a little bit better about letting her eat the stuff. We were also gifted a couple of colours of Maggie’s Natural Food Colouring, but at $12/colour, I didn’t want to use it on an art project. You can find Maggie’s Food Colouring at Raspberry Kids–one of my favourite Canadian owned Kid’s stores!
Miss A wasn’t nearly as excited about the whole thing this time around (go figure). I had to force her to sit still and actually paint. She wanted to get up and run away with the paint bowls! Oh, and she didn’t even TRY to taste the stuff! Sigh….
This article was written by Andrea
Have any of you tried making finger paint? Do you have a fool-proof recipe to share? What about natural dyes? We’d love to hear your ideas!