Feeling the Burn

heartburn

If you have ever suffered from heartburn, then you know just how uncomfortable and painful it can be. Heartburn during pregnancy is no different. With my first pregnancy I started getting heartburn sometime in the middle of my second trimester. It was pretty bad (my son did come out with a glorious full head of hair though – old wives tale or what?). And, for someone who didn’t even know what heartburn felt like prior to this it was, at times, unbearable. Little did I know that it was gonna be nothing compared to the heartburn I’ve experience this time around.


The heartburn started much earlier and has escalated to “severe” status. And I mean a constant, unrelenting, sleeping pretty much sitting up severe kind of situation. How do you deal with this kind of heartburn? I’ve definitely had to come up with some much more fancy relief techniques than popping some tums and avoiding coffee.


It would definitely help to understand the reasons behind pregnancy heartburn, for starters. For those of us in the baby making way, heartburn can have some different triggers than for the average joe.

  1. Hormones.

    Yay! Another reason to love those hormones. Progesterone is responsible for relaxing muscles in your uterus, but in the meantime also relaxes the muscles that keep that stomach acid where it belongs. So, it’s much more likely to just back up into your esophagus whenever it feels like.

  2. Sluggish digestion.

    Progesterone is also to blame for this one (along with a large uterus blocking things up). This can cause back up of stomach acids.

  3. You are carrying a baby inside you (obviously).

    The larger the baby gets (and therefore your uterus), the more likely it is to cause you all sorts of discomforts. When it comes to heartburn specifically, it can mean baby + large uterus pushing on your stomach just pushes the acid up and out.


So, as you can see sometimes avoiding heartburn is probably just impossible. I mean how do you prevent a growing uterus from pushing stomach acids up? There are some things you can do to at least help prevent it from happening as much as possible and (hopefully) keeping it from reaching severe levels.


I have found after dealing with it twice that the general “how to avoid heartburn” guidelines are less than effective during pregnancy, but they do have some merit.


  1. Avoid foods that trigger heartburn. I’m sure you’ve heard the list before (coffee, citrus, chocolate, spicy food, etc), and this is only been slightly true for me. Some of these foods do definitely trigger heartburn, don’t get me wrong, but I’ve been able to scarf down all the chocolate and spicy food in the world and feel fine. I would adjust this recommendation to – figure out what your triggers are and avoid them. On the flip side, I find some foods help to ease the burn. Bananas work wonders for me. So, also, figure out what those are as well!
  2. Don’t eat big meals. If you are super pregnant, you probably aren’t anyways. But, this definitely helps. Several small, more snack like meals a day help keep the burn away. I actually find if I get too hungry heartburn starts to creep into the situation, so this helps from both ends.
  3. Stay upright as much as possible. That includes while sleeping. I sleep with a few pillows to keep me propped up. This helps IMMENSLY.
  4. Eat something soothing close to bedtime. This goes against everything they will tell you about heartburn! But, if you’re anything like me you might find yourself waking up in the middle of the night hungry, so this has you covered in more areas than one. Like I said bananas work great for me, so close to bedtime, I eat a banana and have a glass of water. This seems to keep me from getting middle of the night heartburn and waking up hungry. Win/win if you ask me.
  5. Take natural digestive enzymes. You can general get these at a health food store or any pharmacy really, but things like papaya and pineapple contain digestive enzymes that help you digest faster and more efficiently. If you don’t want to buy the pills just eat some papaya!
  6. Take probiotics. This is in no way a fix it quick solution but more of a long term, mild helper. Probiotics = better digestive = less heartburn.
  7. Stomach soothing teas can also provide some relief. Ginger and chamomile are both good at helping keep your stomach acids calm.


I find that trial and error is the best way to deal with heartburn. Find what works and go with it. Everybody is different. I definitely find myself popping tums once in awhile. Severe and constant heartburn can cause permanent damage to your esophagus so, if at the end of the day you are still severely suffering after trying it all, I suggest talking to your doctor/midwife.


~ Written by Nicole

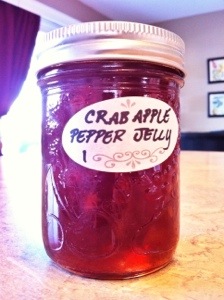
Crab Apple Pepper Jelly

20131124-132112.jpg

My neighbour has a crab apple tree, and he told me I was welcome to pick apples if I wanted some. When it comes to crab apples, they are pretty much good for one thing – canning. Crab apples have excellent natural pectin, and set up to a gorgeous jelly!
When I first made this recipe, I put it into pint jars, and ended up with only 3 jars. So I recommend to use the 4 oz jar, so that you can give more as gifts, or enjoy it in smaller batches. Or just to feel like you didn’t work your butt off for 3 jars.
Homemade jelly makes a great gift, paired with a bottle of white wine and some nice crackers. It says “I love you enough to slave over a hot stove AND buy you wine.”
This jelly isn’t fiery hot. If you want more spice, use hotter peppers (not more peppers, just the hotter variations). I used banana type peppers and ended up with a full flavoured, but very mild jelly. Colin said it was good, but he would have loved for me to use something hotter. Some varieties are jalapeño, serrano, or habanero if you are brave enough. I’m not. I am, admittedly, a total wuss about spicy food.
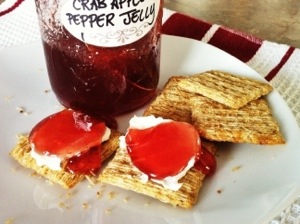
This jelly is delicious with cream cheese on a cracker. I’m sure it is great on chicken, or other uses, but I will likely eat all of it on a Triscuit with cream cheese.

20131124-132120.jpg

Crab Apple Pepper Jelly:
This recipe makes 6 of the 4oz jar size (that’s the smallest one)
2 lbs crab apples
1 1/2 cups water
Red wine vinegar, as required
3 3/4 cups granulated sugar
1 cup yellow or orange bell pepper
1/3 cup hot pepper (as desired for flavour and heat level)

Instructions:
1. In a Dutch oven, bring crab apples and water to a simmer. Make sure to remove stems. I also cut them in half to speed up the cooking time.
2. Cook until the crabapple are very soft.
3. Line a colander with cheesecloth (the more you fold over the cheesecloth, the clearer your jelly will be). Place colander above a bowl (preferably glass).
4. Pour the crabapple mixture into the colander and weigh down with a plate and heavy can on top.
5. Let stand until dripping stops. Discard the pulp.
6. Pour collected juice into a liquid measure. Add enough vinegar to make 3 cups.
7. Combine in a saucepan with sugar.
8. Bring to a boil, stirring constantly.
9. Add peppers and boil for 8-10 minutes or until set. (How do I know if it is set? Insert link)
10. Stir for 7 minutes to avoid floating peppers.
11. Pour jelly into hot, sterilized 4oz canning jars.
12. Seal with 2 piece canning lids. Process in a boiling water canner for 5 minutes (adjust as required for elevation).
13. Let the processed jars sit for 24 hours undisturbed. Check for the seal to stay down when pressed prior to storing.
Enjoy!
This recipe is originally from food.com


The Mush Ends Here!

I couldn’t wait for my oldest to start solids! I was sure it would mean longer stretches of sleep and who can argue with that right? My only concern was the amount of work that seemed ahead. I had friends who spent entire days, roasting, pureeing and freezing ice cube sized portions of baby food for their little ones, and honestly, it didn’t look like a lot of fun to me!

When my daughter was about 5 months old, I came across a pin on good ‘ol pinterest about “Baby Led Weaning”. Intrigued, I clicked on the pin and it linked me to the book: “Baby-Led Weaning: The Essential Guide to Introducing Solid Foods-and Helping Your Baby to Grow Up a Happy and Confident Eater” by Gill Rapley. I pinned it onto my own board and a friend of mine commented that I should definitely look into it because she used baby-led weaning for all three of her kids and LOVED IT. I ended up e-mailing her, and asked her a few questions and when we were ready started using the method and LOVED it. I was so happy that I didn’t have to invest in a food processor, and those ice cube trays or those little glass food containers! It was also WAY less work .

I’m certainly no expert on the matter, but I do have a little bit of experience now that our second is ten months old and eating solids. So, how does it work? At about six months, most babies are developmentally capable of feeding themselves proper food, in other words – no more mushy peas! Hooray! You just hand them the same food that you’re eating in an appropriately sized piece and if they like it they eat it and if they don’t they won’t. (But they do…trust me). That’s all there is to it! No purees, no ice cube trays, no food processor, no food mill, no expensive organic baby rice, or weird fruit and vegetable combos in pre-packaged baby food jars! Just you, your baby and the food that you’ve prepared for the entire family! Because, let’s face it, the more time you spend preparing baby food, the less likely they are to eat it, right? As I mentioned before, I have friends who would spend days steaming, roasting and freezing food for their babies, only to have them refuse it *insert bitter tone.* The best part of Baby-led weaning is that there is no pressure on your little one to eat. There really is no opportunity for mealtimes to become a battleground, so issues such as food refusal and food phobias are much less likely. I think it’s because there is no such thing as baby or kid food anymore. Everyone eats the same thing, so you don’t have to worry about introducing “real food” when your child is 4 or whatever. This method respects babies’ decisions what to eat or what not to eat and when to stop eating, so there is no need for battles to ensue. I LOVE IT!

blogphoto

The question I get the most from parents who are interested in baby-led weaning is: “So, what do you feed your baby?“

To help you out, here is what we had to eat today at our house:

Breakfast

  • Toast, yogurt, granola, fruit

Snack

  • Fruit, crackers, cheese

Lunch

  • Soup, quesadillas, cut up peppers and Cucumbers

Supper

  • Beef and vegetable stir fry, rice

Dessert

  • Fruit

For our baby, we just cut the food into smaller pieces and allow her to pick what and how much to eat. Remember, when babies first start to eat solids, they probably won’t eat too much (unless they’re like my girls who practically gave up nursing as soon as we starting giving them “the good stuff”). Your little one decides how much solids they can handle and then supplement the rest of their nutritional requirements with milk (breast or formula).

Here are a few tips to help you along:

1. Forget baby food. It was really hard for me to wrap my mind around this at first, but if you don’t want to, you don’t have to give your baby so called “baby food”. My oldest daughter’s first meal was chicken, potatoes and peas. She LOVED it. We just cut the chicken into finger-sized pieces and she ate it. (She didn’t have teeth until she was 10 months old and still managed to eat it just fine!) My second daughter’s first meal was spaghetti.

2. Expect a mess. Put a few pieces of food (not too much food) on your baby’s tray and let them go to town!

3. Relax. With our first daughter, I was really nervous about choking. Remember, gagging is ok. It is a safety response to prevent choking. Babies seem to have very sensitive gagging reflexes, and that‘s good!

4. You know your baby best! Remember that!!!

So, what do you think? Will you give it a try? I promise if you do, you’ll love it!!

~Written by Andrea

About Face – All-Natural Face Cleansing

20130630-111754.jpg

20130630-111804.jpg

Skin. It seems such a trivial subject. If you are one of the “lucky” ones, you have a clear complexion and rarely think of it. But if your skin has any amount of issues: acne, uneven tone or texture, dryness, oiliness, and the list goes on, you probably think about it a lot! In the morning when you first get ready, each time you are in front of a mirror throughout the day, washing up at the end of the day. If you have major skin problems, it has likely led to self-consciousness, embarrassment, and in some cases even depression.

I wish I could tell you I have the miracle 5 second cure. I don’t. Skin is complicated and everyone’s is different. What I do have is an arsenal of natural options and tips to help you clear up most issues. It may take some playing around and testing what makes your skin happy. In the long run, it is so worth it, I promise!

At the top of this post are 2 photos of me “before.” This was a little ways into my natural skin routines, and let me tell you, it has been much worse in the past. I only show you my photos “au naturel” because I love you. This is filter and edit free (so are my “after” shots)!

I had never had bad acne, just the odd breakout, and small whiteheads along my forehead. I have always followed the more is more approach to skin care. Scrub twice a day, use toner, exfoliate a couple times a week. Now, this in and of itself is not the issue, per se, but rather the products used to achieve it.

One stupid decision to try a certain highly televised acne brand left me with cystic breakouts along my jawline. They were nasty to look at, impossible to cover, and hurt like the dickens. Enter a dermatologist. He informed me said acne routine was too strong for my skin, and prescribed a topical gel with an unpronounceable name. It stung like crazy, but seemed to dry up a few zits. But the breakouts kept bubbling up, and I knew it was more than just the result of me being so “proactive.”

A few years later, and I was in full Eco Housewife mode. So wouldn’t it make sense to find out the natural options for my skin?
I tried the trusty health food store, but wasn’t 100% satisfied. I was sure there was an easier option. Enter the Internet. Apparently there is thing thing called the “OCM” or “Oil Cleansing Method.” Here is the general idea: facial soaps over-dry the skin, irritating it and leaving it susceptible to contamination and causing it to over-produce sebum, therefore breaking you out. Similar to the scalp in Nicole post here, all I needed to do was help restore my skin’s natural moisture balance and it would look after itself!

The other tenant of OCM is that like dissolved like. What this means is that oil dissolves oil. So using oil to “wash” your face actually helps to break down the clogged and hardened oil breaking out your skin. I think of it like paint – if you have ever used oil-based paint, there are two ways to clean your brushes – stripper or oil – which one damages your brush more? The chemical stripper! The oil will not only clean your brush, but soften and condition it!
Now, since this post gets into more than just OCM, I will direct you to two websites that lay out the “how-to” beautifully: Crunchy Betty and This Page.

So – did the OCM fix it all? Not all at once. I have to admit that it is time consuming and on days when I hadn’t worn makeup, I often skipped it. So I stopped washing my face. I left it alone. If it felt dry, I used a little of my OCM mixture as moisturizer (this works wonderfully by the way!), and I use a little toner in the evening to keep it happy and remove excess dirt. Once a week I exfoliate with a honey scrub to remove any dull, dry skin, and that is it! And my skin has never looked better! The photos of my extremely improved skin are at the bottom. (Recipes for all of this goodness below)

But here is the clincher – I am eating healthy! The husband and I are majorly cutting back on grains and white carbs, we have all but eliminated processed food, and also stopped eating dairy.
WHAT? NO DAIRY? I know, I know. But here’s the thing – my naturopath long ago discovered that I am allergic to dairy (casein, specifically) and it was causing my runny nose, earaches, digestive upset, and quite possible BREAKOUTS. So if you have chronic acne, I highly suggest a visit to your local naturopath, as you may have an allergy that is the underlying issue.
Ok-back to diet. Since we cleaned up our act, I break out less, and I notice that I am more prone to breaking out on our “cheat” days. So as much as I miss ice cream, I love being able to put on less makeup before heading out in the morning. And I love that my skin care routine is really so simple!
So here are my personal concoctions – so easy to make and not expensive at all (the oils can be pricey at first but a little goes a looooong way!)

Aubrey’s OCM Mixture:
2 parts castor oil
1 part sweet almond oil
5-6 drops tea tree oil (the husband and I like the extra zit-fighting power here)
*all oils are organic and high quality – this is going on your face, right?!

Daily Toner:
1/8 cup witch hazel
1 Tbsp organic thyme (the fresher the better, but dried is ok)
Soak the thyme in the witch hazel for 2-4 days. Strain out thyme. Place witch hazel in a bottle and add desired essential oil. Lemon oil brightens, but can make skin more sensitive to sunlight in summer. Good ol’ tea tree for acne ka-pow!
Soak a cotton pad with mixture and wipe over the face. Witch hazel helps to balance skin’s moisture and other lovely things. Thyme fits blemishes too! See why this is working so well? (PS – Crunchy Betty has a recipe similar to this too – so I’ll give her some props, credit where credit is due and all that)

Another great toner is a simple mixture of 1/3 apple cider vinegar and 2/3 water. It works wonderfully on breakouts.

Weekly Exfoliator:
1Tbsp baking soda
Drizzle raw honey
2-3 drops lemon essential oil
Stir it all up to avoid clumps. Scrub before getting into the shower. Shower off, or wipe off with a warm washcloth. I make this one in small batches because the baking soda fizzes up a bit and doesn’t feel as nice a few days later.

20130630-111917.jpg

20130630-111934.jpg

Do Some Sprouting!

I love this time of year! If you were on the ball you might already be harvesting goodies from your garden! In our neck of the woods,   cherries are almost ready and we are on our second crop of yummy leafy greens like kale, lettuce and spinach. However, if you hate gardening or if you have a black thumb but still want to enjoy fresh, raw, nutrient dense greens in  your diet you should try sprouting. It’s so simple and you only need a couple days before you can enjoy the harvest!

Sprouts are a superfood for so many reasons. They are excellent sources of essential nutrients, high in protein,  great sources of enzymes, easy to digest and good for weight loss. I usually sprout lentils, beans and fenugreek, but broccoli, radish and clover are also  yummy options. Just be sure to avoid alfalfa as it is mildly toxic and also inhibits the immune system.

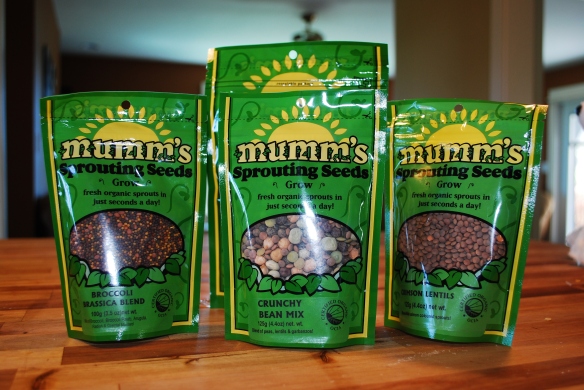
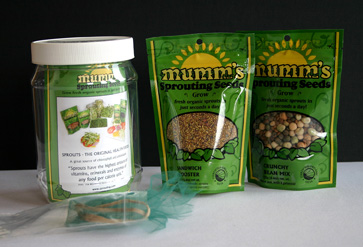
I usually get my sprouting seeds from Mumms. I love Mumms because they are a Canadian based business out of Saskatchewan and all their seeds are certified organic.

DSC_0115

Now to the good stuff….How to sprout.

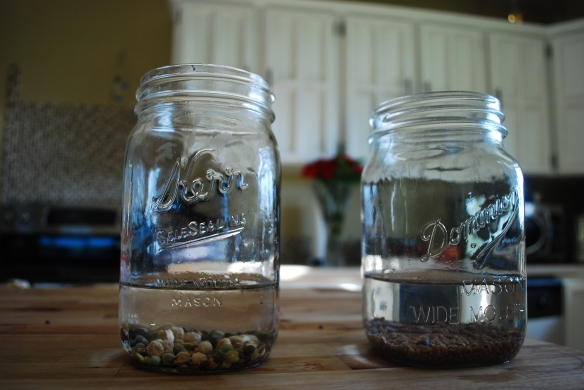
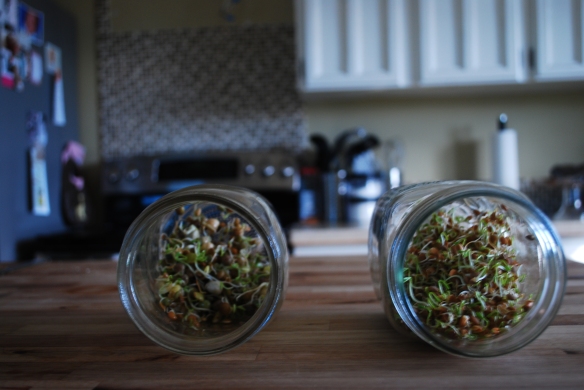
There are several ways to sprout seeds, but I will tell you how I do it. All you need is a mason jar. Dump about 2 Tbsp of seeds into the jar, add water, swirl and drain. Refill the jar with about a cup of water and soak your seeds for about 2-6 hrs. Drain the water. Rinse your seeds twice a day by refilling your jar with water. Drain the water and lay your jar on its side so that your seeds don’t mold in water. You could also cover your jar with mesh and keep your jar inverted to prevent mold from growing, this also makes the rinsing easier!

DSC_0204DSC_0206

You can eat your sprouts whenever you want. I like eating them with longer tails, but some people enjoy them sprouted with no tail. They are perfect in sandwiches, tossed in salads or you can just grab a handful and enjoy!

So, who wants to add sprouts to their diet?

If you do, just comment here and we will send one lucky reader the “Get sprouting jar” from Mumms.

image 129 small

Share this post and let us know you did for an extra entry. Winner will be chosen June 19th.

The Great Microwave Challenge – Update!

So – the Great Microwave Challenge. Here I thought I was being such a go-getter, ditching my microwave. Only to have a bunch of friends comment that…they had ditched theirs ages ago. OK – so maybe my idea wasn’t a new one. But I still think it was a good one!

And the overall concensus – I don’t need, or want, my microwave. For the first few weeks it sat with a huge ugly sign on it. Then I had to make sure my visiting in-laws knew that although there was a big ugly sign, they were allowed to use it.
And I am proud to say – I only broke down and used it ONCE! We had made BBQ’d ribs, but I had to leave for book club before they were done (insert me wailing and gnashing teeth here). So I got home from book club late at night. And I wanted. RIBS. NOW. So I did it – I nuked them. And it ruined them. I should have eaten them cold…or later…or watched some PVR’d Real Housewives while they heated in the oven. Moral of the story – microwaves suck the big one.

Ever since the ribs, we haven’t touched our microwave. There are times when I think “HOW WILL WE MAKE NACHOS?” and then I remember that oven nachos are actually tastier. Crispy, warm chips. No raw cheese in the middle and burnt cheese on the edges. It doesn’t seem so desperate anymore.

So my microwave has been dethroned. It is unceremoniously waiting to be sent to the thrift store. There was a large empty space on my counter that now holds my coffee maker, which used to be squished up tight to the microwave. There were crumbs in that section of counter that deserve to be carbon-dated. I felt very good about myself while I wiped that part of the counter. Go me. All “ditching the microwave and cleaning stuff too.”

I am also ditching those nasty plastic covers made for preventing splatter in the microwave, but dripping BPA into our food. Next on the docket is the piles of plastic containers we own. There are some that haven’t seen the light of day in months.

If you are still hemming and hawing about ditching your microwave, just do it. You will survive. Your husband WILL get over it (I bribed mine with a toaster over). Your inlaws will even be ok. Your nachos will never be better.

PS- Completely off topic…but someone told me this week that “my hippy was showing.” Apparently you can’t say “hemp hearts” out loud without that happening…

Giveaway!

Well, The Ecohousewives and Little Black Cat Organics have teamed up to do a Giveaway! There are two prizes:

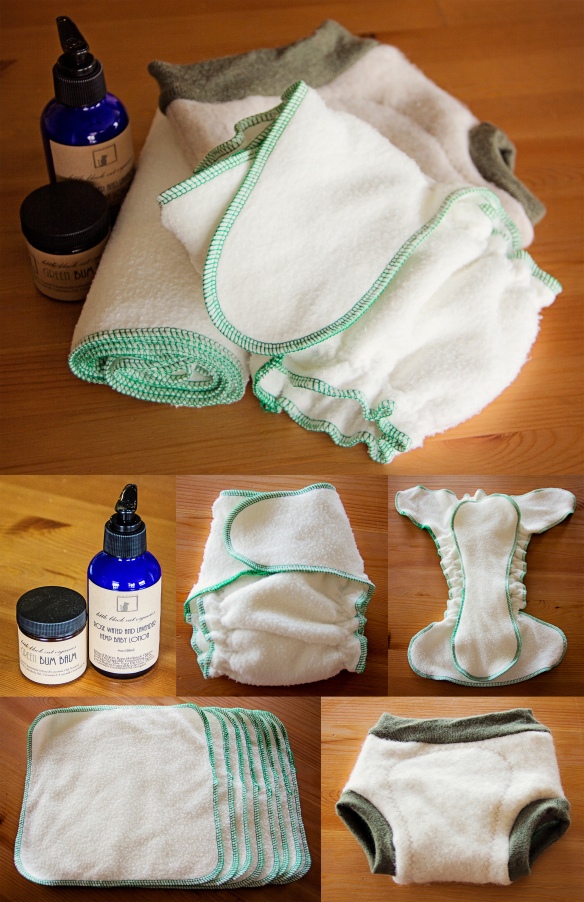
1st Place is a prize pack that includes:

  1. One size Bamboo/Organic Cotton Fitted Diaper – fits approx. newborn to 35+ lbs
  2. 8 Bamboo/Organic Cotton Cloths Wipes – measure approx. 9″x9″
  3. Medium Pull-up Recycled, Felted Wool Soaker – fits approx. 10-22lbs
  4. Rose Water and Lavender Hemp Baby Lotion – 4oz bottle
  5. Green Bum Balm Diaper Rash Salve – 1.7oz jar

giveawayfinal


2nd Place is a $15 Gift Certificate to use towards anything from Little Black Cat Organics

Enter on our Facebook page, Little Black Cat Organics Facebook page or at a Rafflecopter giveaway directly and don’t forget to share, share, share! Contest runs until 11:00am Pacific Time on Friday May 24, 2012.


Juice Monkeys – the fruit and veggie kind!

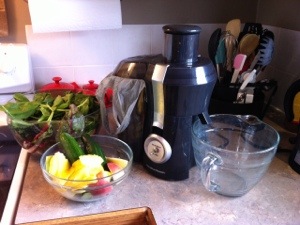
20130513-192624.jpg

Colin and I recently starting juicing. When I talk about juicing, I don’t mean a glass of orange juice from the grocery store, I am talking about freshly pressed juice from a variety of fruits and vegetables. We had been considering it around the time that we first watched “Hungry for Change,” but had pretty much just been making smoothies with spinach and parsley thrown in for good measure. We have a juicer, but it collected dust in the cupboard until we watched “Fat, Sick and Nearly Dead.”
I know, I know, it seems like we make a lot food decisions based on documentaries. But look at it as an hour or two contains A LOT of information, and it is up to you what you do with that. We decided to make some changes with our eating.

What makes a lot of sense to us about juicing is what is in the juice itself – veggies and fruit. We have been making decisions to include more and more veggies in our diet, but juicing is like “extreme veggie eating,” and here is why:

1. Freshly pressed juice contains a lot of macronutrients. These nutrients include vitamins, minerals and other health and immune boosting components.

2. You get the health benefits of so many more vegetables and fruit than you would EVER be able to consume in one day. Just think, for breakfast, would you be able to eat an apple, half a grapefruit, half a cucumber, 4-5 leaves of kale, a handful each of parsley and spinach? I highly doubt it! By juicing, we remove the insoluble fibre, but keep the soluble fibre and all of the nutrients intact, and you can consume all of that in your juice!
If you want more info on the benefits of juicing, go here

So with all of this lovely knowledge, we had to decide how we were going to bring it into our diet. Although in “Fat, Sick and Nearly Dead,” Joe goes on a 60 day juicing fast, we knew that wasn’t for us. So we started slowly. We made juice the night before and had it ready and on-hand to replace our breakfast.
This is a great way to introduce fresh juice. It replaces a meal many of us are likely to skip anyhow, and it is a great grab-and-go option. Another choice is simply to include a nice tall glass of freshly pressed juice as a snack, or along with your lunch. It is better than not at all, and will kick start you getting all of those amazing nutrients!

After a few days of juice as breakfast, we decide to take the plunge…in the shallow end…and we are currently on a 5 day juice fast/cleanse. A big part of why we are doing this is to detoxify and clean out our bodies. Rather than get into detail here on this 5 day program, check out the Reboot website!
I would rather leave it to the experts to explain all of the dirty details, instead of missing something vital here!
Once we have finished this 5 day plan, I will let you know how it went, and how we feel.

So, onto the fun part, juicing! Here is my advice. I hope it helps!

1. The first thing you will need is a good quality juicer. Don’t feel like you have to break the bank, but do some research and make sure it can handle leafy greens and firmer fruit, like apples. You don’t want to try and start juicing and all you bought was a citrus juicer!

2. Try to juice organic produce when you can find it and if you can afford it. It means that no pesticides etc will be in your detox juice, when that is the garbage you are trying to get out of your body anyways!
If you can’t go organic, be sure to wash all produce very well before juicing. It is best to leave the peel intact on apples, pears and carrots if you can, so scrub away!

3. Beets hold a lot of dirt, so either peel them or scrub them well, organic or not. Muddy tasting juice isn’t enjoyable for anyone!

4. Citrus fruit – to peel or not to peel? Again, if it is non-organic, scrub well. Some citrus fruit may even be waxed, so check for that before juicing. Otherwise, it is a personal flavour decision. I enjoy the fresh, bright flavour of lemon rind, but my husband finds it too sour and prefers to peel lemons. As far as oranges and grapefruit go, we have peeled them every time.

5. Follow the manufacturer’s instructions for your juicer. Know what it can handle, how you are supposed to juice certain items.
I got out juicer for free on Freecycle, so I had no instructions. If you happen to be sans instructions as well, it is usually a good idea to start with an easy to juice item, like a cucumber, follow with all the leafy greens, then apples, and end with easy juicers with a lot of liquid, like cucumber, pineapple or citrus fruits. This makes sure that cleaning your juicer goes much easier and nothing gets clogged up.

6. Experiment! It is just juice! Try a little ginger, it is full of healthy benefits. Be brave and juice some garlic! Whaaaaaaat???!!! I know…people do it. I have not yet been that brave!

7. Don’t try to juice avocado or bananas!!! If you want these in your juice, you will have to blend them with your juice in your blender. This isn’t a bad thing, and it creates a thicker, more smoothie-like texture.

8. Put a bag in the part of your juice to catch all of the non juicy waste. Even better if the bag is compostable and you compost everything instead of throwing it away.

So now that you are a juicing pro, here are a couple of recipes:

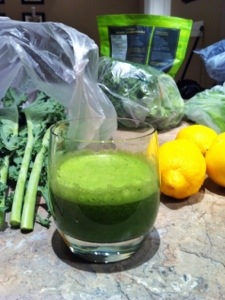
The Jolly Green Giant: (a great all-around green juice)
5-6 kale leaves
2 handfuls spinach
1 handful parsley
1 cucumber
2 apples
1 cup pineapple
1 lemon
Juice it all up! Much better cold (refrigerated or poured over ice).

The Happy Place: (Great as “dessert,” or when one more glass of green juice might make you a crazy person!)
1 1/2 cups pineapple
3-4 oranges, peeled
1 large ruby red grapefruit, peeled
So good poured over ice, still frothy from the juicer!

Two great websites for more juice recipes:

http://www.rebootwithjoe.com/recipes/ (obviously)
http://www.juicemaster.com/recipes/

20130513-192729.jpg

Strawberry Jam!!

I walked into the grocery store the other day and sitting there in all their glory were flats upon flats of fresh, beautiful strawberries! And of course, strategically placed right in front of the main entrance. How could I resist? 6lbs for $7? Pretty good. I thought to myself however, “Don’t bother… It’s just the beginning of the season. They WILL get cheaper!” Did I listen? Nope! I bought a flat. I wanted to make some jam!!! (And eat some of course!)

I’ve been itching to start some canning for awhile now. Last season I didn’t get much in. Between a kid under 1 and a husband who works out of town, there really wasn’t too much free time for canning. So, this is the perfect opportunity to get a little started! Strawberry jam, so delicious! So, here we go!

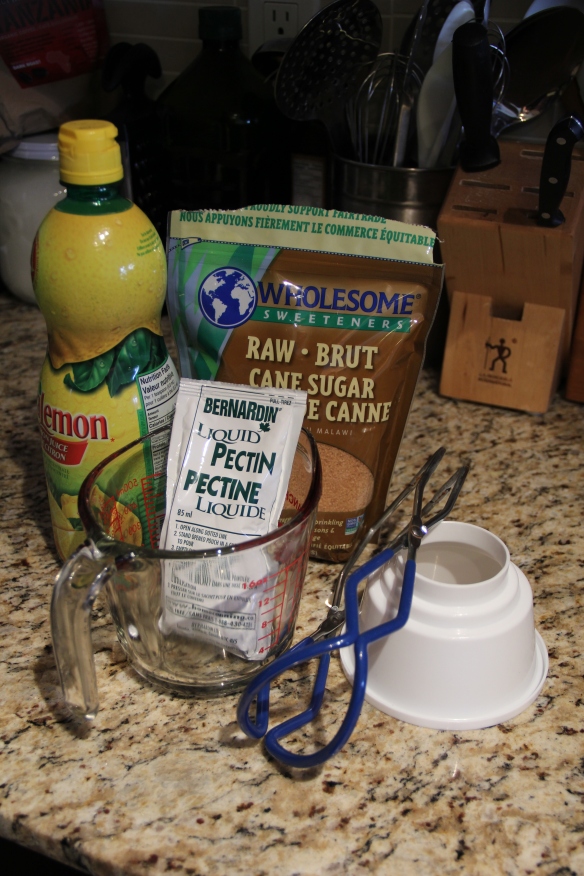
If you do a lot of canning already, you probably have the basic instruments needed to do the job. But, just in case you’re new to this here’s a short list of some stuff that’s good to have on hand:

-For jam specifically, you need just the basic Water Bath Canner, which can be found at pretty much any big box store for a very decent price.

-Jar lifter – this isn’t necessary, but your job will be so so much easier with it

-Canning funnel – again not necessary but makes the job much easier

-Mixing bowls, measuring cups and spoons, etc

For strawberry jam you will need (besides the strawberries!)

-some lemon juice

-sweetener of your choice (sugar, honey, some people use white grape juice, stevia, or a combo of sweeteners)

-pectin. I use liquid pectin, but you can also get it in crystallized form as well. This is just a preference thing.

 IMG_4404 IMG_4401
Step 1:
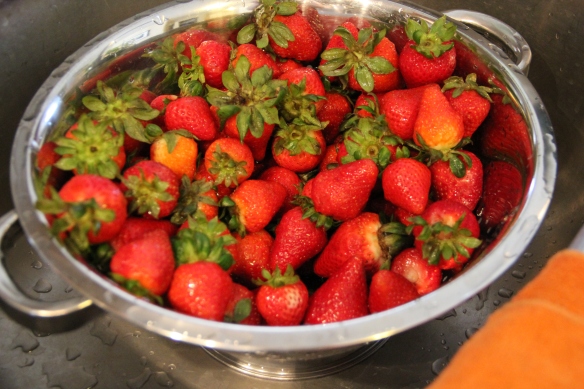
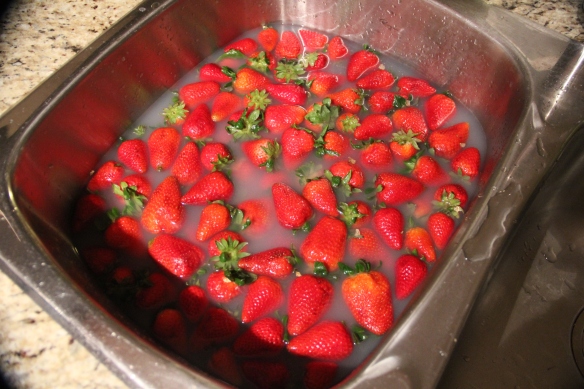
Before I made my jam, I washed the strawberries of course. I chose to soak them in a cool bath with castille soap first, to get any dirt, grime or pesticides off as best I could. I let them soak for about half and hour then, rinsed them off really well in cold water.
IMG_4398
Step 2:
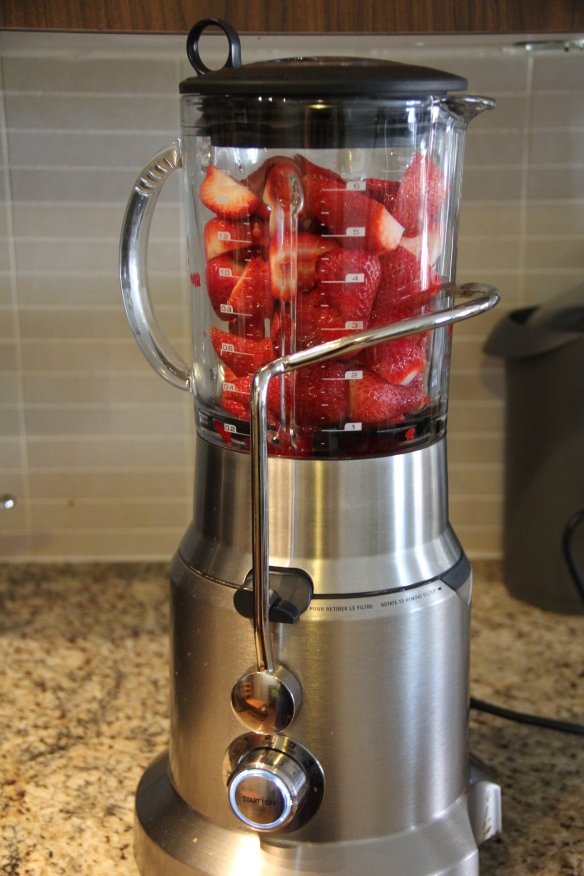
This step may look a bit different for each person depending on how you like your jam. I don’t like chunkies in my jam so I chopped up my strawberries in a blender until there were no large chunks. It’s a good idea to add a little water to aid in the chopping process. You don’t have to puree them as they will dissolve more during the cooking process.
If you don’t care about chunks, you can go ahead and just mash them up with a potato masher by hand. This shouldn’t take you very long.
IMG_4400
Step 3:
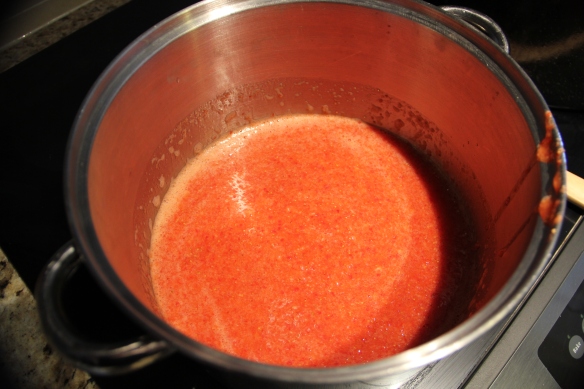
Add your mushed up strawberries to a pot with the sugar. Most recipes will have a 4 cups strawberries (measured after crushing) to 7 cups sugar ratio. I used 6 cups of strawberries (measured after crushing) so that’s 10 cups of sugar. I know! So much sugar. Welcome to the jam world! Strawberries especially require a lot of sugar. You can reduce the amount of sugar but you won’t get the same consistency. Even when using no sugar needed pectin (which I personally don’t like as I never find it makes very good jam). If you reduce the sugar you will usually yield a runnier jam. It will still be as tasty though! I usually do reduce my sugar to about 8 cups. The jam turns out soft but still thick and spreadable. *If you are new to jam making I would stick to the recommended amount of sugar. It can be difficult to get the correct consistency when you are playing around with the sugar levels and so I recommend having an idea as to what you’re trying to achieve before changing it.
If you are using crystallized pectin, you need to reserve about 1/4 cup of the sugar to mix with it. I do recommend reading the instructions that came with your pectin, though. 
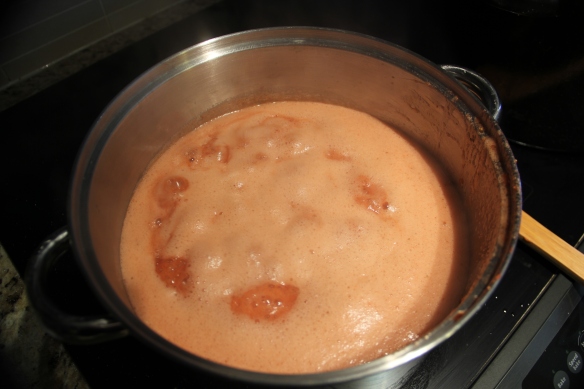
You will want to bring this mixture to a boil. Try doing it a little slower, this will generally result in a better jam. Once it is boiling, continue to let it boil for a few minutes, stirring occasionally.
*I don’t recommend making batches bigger than this.
IMG_4402
Step 4:
Slowly add your pectin to the mixture. Return to a boil and keep there for about a minute or so. Remove from heat. Add about 1/4 cup lemon juice.
Because I didn’t use as much sugar, I added 2 packets of liquid pectin to my recipe. (It is technically a double recipe according to their instructions anyways). To figure out how much pectin you need is going to take a little experimentation on your part. It will really depend on how you like your jam. If you like it runnier, then you will need less pectin, thicker will need more pectin. I will tell you how to figure it out in the next step.
IMG_4405
Step 5:
Skim the foam off the top of the jam. This foam is nothing gross, don’t worry. It is pretty much just escaped air trapped in jam goo (great description!).
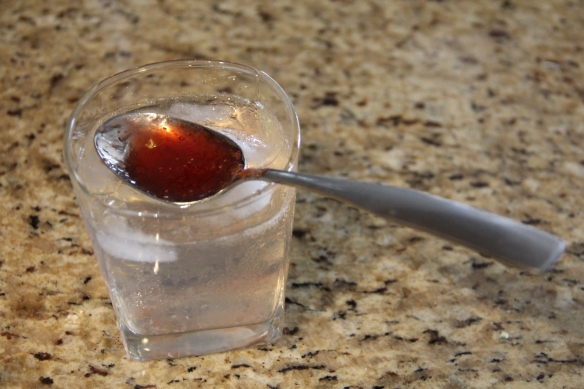
Now, this is where I like to test if my jam is ready. Take a glass of ice water and place a spoon in it. Once the spoon, is cold, scoop up a little jam and rest the spoon back on top of the ice. Once the jam has come down to room temperature, you can check it’s consistency. Touch it, tip the spoon around, etc. If it’s at a consistency you like, then perfect! You are ready for the next step. If not, return it to the stove and repeat step 4 but with about a quarter of a packet of pectin. Repeat the test. Continue doing this until you reach your desired consistency.
IMG_4407
Step 6:
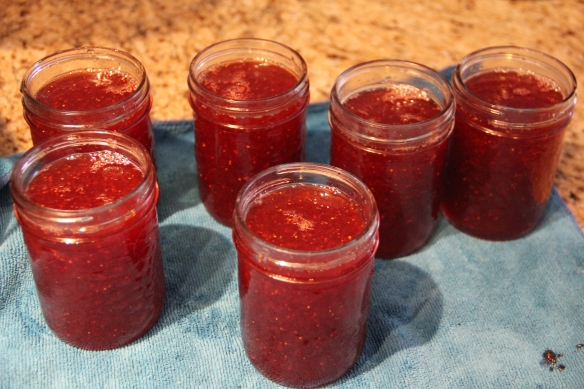
Fill your jars with jam. Leave about a 1/4in headspace (unfilled area) at the top. Tighten caps to finger strength tight. You need them to be tight enough to not let water in, but to let air out.
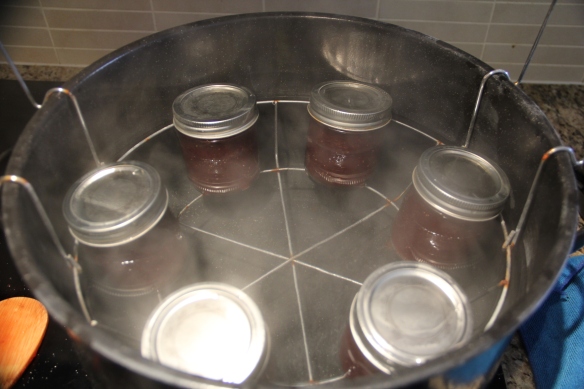
Place them in your water bath canner and process for 5 minutes (or more depending on elevation. I recommend looking this up before you do any canning. It does make a difference.)
You should always wait until the water in your canner returns to a boil before starting the count.
IMG_4408IMG_4410
Step 7:
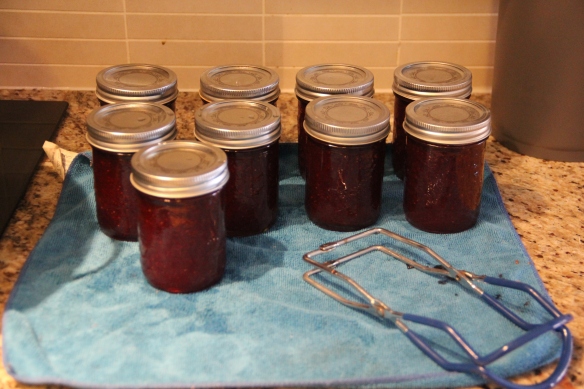
Remove jars from water bath and place in an area out of direct light. Let them seal and cool to room temperature before storing.
IMG_4411
You’re done! Yay! Jam can be enjoyed right away. No need to wait for this one! If any of your jars don’t seal, put them in the fridge and eat them immediately. They will keep in the fridge as long as jam does, but they will not keep stored with your other canning.

Written by Nicole
Homemade Vitamin Gummies for Kids

First off I want to thank the ladies at  The Eco-housewives for asking me to write a guest post! We went to high school together but lost touch over the years and it is nice to watch their families grow and get to know each other again!

I am married to a very hard working man who is father to my three children aged 1-4 years old. We currently live on the East side of Canada and I am loving the early(ish) spring that they have here! I am a stay-at-home mom and I’m looking into homeschool for my oldest this fall. I am also an active member of the Weston A Price Foundation and a doTerra independent consultant.

I was reading about how Wellness Mama makes vitamin gummies for her kids and thought that would be a great way to get my kids to take their fermented cod liver oil (FCLO).

Why don’t you just give your kids the yummy tasting regular cod liver oil you ask? Because the regular stuff is heat processed, bleached, and deodorized to remove that fishy taste and the vitamins (usually synthetic) are then added back in. FCLO is the old fashion processing techniques, which involves fermenting and a proprietary filtering method, all at low temperatures to preserve the fragile unsaturated fatty acids and vitamins. FCLO is also higher in the wonderful vitamins D, A, and K2 and therefore you can take a smaller does.

If you are interested in more information about FCLO you can visit HERE

So.

Now that you know how awesome the stuff is how to I get my toddlers to take it? I turn it into a candy of course! You could add any number of vitamins to these gummies but be aware that if you add too much oil they will not solidify well (which is why FCLO works well because you can use less!)


INGREDIENTS:

Small pot

Ikea ice cup trays (or other gummy sized moulds)

Coconut oil (to grease the mould)

2-3 ml FCLO (or other vitamins, minerals or supplements)

8 tsp of Gelatin

2 TBLS of Raw Honey

1/2 cup of liquid. You could use fruit juice, water Kefir or even Kombucha!

3-4 drop of doTerra essential oil in Lemon or Wild orange. (Optional)

***If you are adding essential oils PLEASE ensure that they are therapeutic grade and recommended for consumption. doTerra is one of the only oils on the market that can be consumed. If you are interested feel free to check out their website. (#342462)

http://www.doterra.myvoffice.com/kimbombak/

DSCF1235_thumb[2]


PUT IT ALL TOGETHER!

If you are lucky to have the awesome gelatin that dissolves easily in cold water then mix everything together really well (maybe in a Magic bullet?) and pour into your greased ice cube trays to set.

If Not……

Warm your juice and dissolve your gelatin.


DSCF1237_thumb[2]

*This is a large batch because my kids eat lots of these!*

Remove from heat and let cool slightly before adding your honey and vitamins and flavouring. If your mixture is too hot your essential oil will evaporate, your honey will no longer be raw and your vitamins may be compromised….so let it cool a little!

DSCF1238_thumb[2]

*Measuring out the FCLO*

DSCF1239_thumb[2]

*Mixing in the FCLO and the essential oils*

*Putting the liquid in the moulds*

*Putting the liquid in the moulds*

One child serving of FCLO is 1/4 tsp. I put 3 tsp into this recipe to get 12 large gummies…which last me 4 days. Pop them in the fridge to keep them fresh.

WATCH!

*See my babies gobble them up..yummy vitamins!*

*See my babies gobble them up..yummy vitamins!*


-Guest Post Written by Kim